DIY garden sculpture made of concrete. How to make leaf-shaped paving slabs Are you ready to make these miracles yourself? It's not difficult, but it requires attention

Crafts made from burdock- These are interesting crafts that you can create together with your children using burdock thorns as the main raw material.
Relevance
In the summer, while walking with children, you can find prickly burdock along the roads. Its flowers - spines - have a remarkable property - they easily stick to various materials and surfaces. Sometimes they can even stick to the skin. This property of the plant can be safely used to create various crafts and decorations for the garden, using imagination and developing the imagination of children.
Due to the ease of fastening individual elements, collecting crafts from burdock can be compared to playing with a construction set. Therefore, this plant can safely be called a living constructor.
During work, it is better to use freshly picked burdock spines. When they dry out, they lose their adhesive ability.
In addition to the thorns themselves, you will need additional accessories in the form of wire, twigs, berries, plasticine, buttons, ready-made toy eyes, and so on, that is, everything that may be at hand during the work process.
To create large crafts, you should use a pre-prepared frame. This way the finished product will not lose its shape and it will be easier to create. In addition, if the creator of the craft has a suitable picture in front of his eyes, then the product will be created much easier and more correctly.
Creating figures

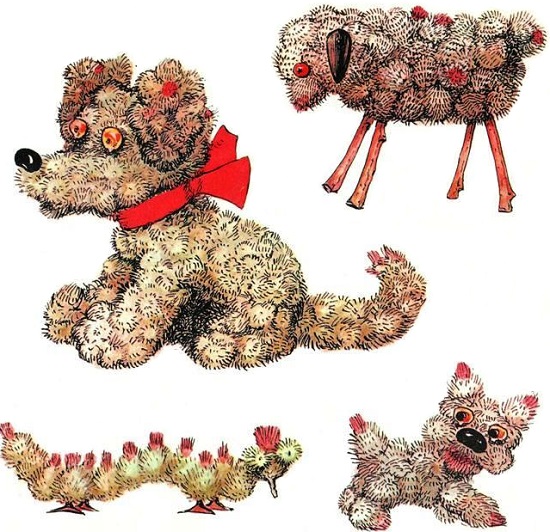
You can mold anything from burdock. Animals, insects and other figures turn out great. To make the figure believable, you need to add details in the form of eyes and a tongue, which are easiest to make from plasticine; if you don’t have it on hand, you can use berries.
- If you fasten several thorns together into one strip, and finish it with a lump of them, you will get a very interesting caterpillar. Eyes for this craft can be made from flowers, berries or pebbles. Then place the finished caterpillar on a burdock leaf, where it will look very harmonious.
- We fasten the burdock spines into one large lump, and then insert thin tree branches into it (three pieces on each side). Instead of twigs, you can use wire (the most convenient in this case is chenille wire for children's creativity). The end result is wonderful spider. It is also necessary to choose suitable eyes and mouth for him.
- Burdock flowers make a wonderful bear. It’s better to start sculpting from the head. First we make a lump of the appropriate size. Then we add small lumps for the ears and one thorn for the nose. Next we make an even larger lump for the body. We combine the head with the body and add paws. We make eyes from berries.
- Hedgehog very easy to do. We form a droplet-shaped lump of thorns and select a suitable nose and eyes. And if you want to get an almost real hedgehog, then use plasticine to create a muzzle, and the spines will become needles on the body of this funny animal.
- Basket It is very easy to make from burdock. We lay the prepared spines on a flat surface in an even layer. In this case, you need to lay out 1 piece at a time, twisting the row into a ring. Having made the base for the basket sufficient in size, we begin to lay out its sides. If the basket is not large in size, then the arc-shaped handle will hold without additional devices. But, if you want to make a large composition, then you will need an additional wire frame for the handle.
Flower wreath
If you use burdock as the basis of a wreath, then you can very easily attach any chosen flowers to it. Decide on the size of the future product, collect suitable flowers and herbs and place them on a burdock base in any chosen order. Such a wreath will be securely attached to your head and will not fall off, even if you move vigorously!
Three-dimensional paintings
Invite your child to make a three-dimensional picture from burdock thorns. First, come up with a plot and make a schematic sketch. You can also use ready-made coloring books for little ones with simple plots. Make the conceived shapes from the thorns, placing them in the traced contours. Then transfer them to the prepared base. It is best made from a material to which the spines will easily stick. For example, from velvet paper or canvas stretched over cardboard.
Learning the alphabet
If you and your child decide to study the alphabet, then the thorns
Around us there is a lot of easily obtained natural material for making crafts. Let's take, for example, burdock or, as it is also called, large burdock. One has only to look around - it grows everywhere: near roads, in parks, in vacant lots, in meadows, in vegetable gardens and fields. We all know it well - it is a weed that children like so much due to its “sticky” qualities.
I think there is no such person who, as a child, would not “fire” at his friends with it. The defeated "shooter", as a rule, then takes a long time to clean his clothes.
Did you know that by using this main quality of burdock flowers to stick to everything and cling to each other, you can make interesting ones out of them. These unsightly prickly lumps can turn into original figurines of animals, birds, insects and even people.
So let's use the basic properties of burdock and try to captivate the children with creativity.
Making burdocks is easy, they look interesting and unusual, and can then be used in games.
In addition, the manufacturing process itself is very useful for children, it allows them to develop qualities such as fine motor skills, imagination, memory, fantasy, eye, and logical thinking.
So, for work we need to prepare a large number of tenacious and fluffy balls-inflorescences.

Pluck each green prickly clump and form it into a large ball. They are well preserved, wrapped in a cloth. It is best made from freshly picked green inflorescence balls before they dry out.
You can sculpt anything from burdock flowers: various baskets, animals, insects, birds. To make elements such as paws, legs, eyes, nose, ears, tail, you can use additional materials: sticks, matches, seeds, leaves, wire, plasticine.
To make a large craft, you first need to make a wire frame, then it will hold its shape better.
Well, each subsequent layer of flowers clings to each other without glue. A picture before your eyes helps to reproduce the shape of an animal, insect, person or bird.
What other burdocks can you make? The first thing that comes to mind when seeing its structure, shape and texture is a hedgehog. And indeed, the hedgehog turns out to be very interesting and really prickly.

What about a “fluffy” teddy bear?

What about such animals and insects?
You can make such a funny elephant. To make it you will need burdock and two burdock leaves.  We are sure that children will definitely enjoy making burdock, so we bring to your attention a few more ideas.
Concrete sculptures have many advantages over products made from other materials. Concrete is more plastic than natural stone, and therefore easier to work with. Such products are resistant to weather influences, they can be left outside, only periodically updating the coating. Another plus is that even a small figurine weighs a lot, and therefore you don’t have to worry about the safety of the garden decor that you’ve worked hard on. This article tells how FORUMHOUSE participants make crafts from cement with their own hands.
Concrete sculpture: master class
The first step towards creation is working on a metal frame, onto which the solution will then be applied. To get thick parts, you need to wrap the frame with fine mesh or wire. The second way to make crafts from cement for the garden is molding, when the concrete solution is poured into special molds, and after hardening, the two halves are glued together and the product is sanded.
Nutabena advises filling the insides with various rags to save cement.
If you don’t have a lot of experience working with cement, it’s unlikely that you’ll get the perfect garden craft the first time. You can start with the simplest crafts. So that errors can be corrected, glue is added to the cement for crafts. The required color is given with the help of pigment added to the composition, or the finished figurine is painted. Using paint, you can imitate other natural materials: granite, marble, wood, etc. Finally, the sculpture of the concrete solution is covered with an anti-graffiti and anti-corrosion coating, which keeps the products unchanged for several decades.
Forum participant, summer resident RUS_095 (Moscow) talks about the technology for creating concrete sculptures that Ukrainian master Vladimir uses.
RUS_095 User FORUMHOUSE
The solution for the product is made from a mixture of cement and sand in a ratio of 1:2. The cement is applied to a metal frame, from which the excess is then cut off. The products are painted with regular façade paint.
From simple to complex
Galina Ara suggests trying your hand at making simple figures and making a mushroom. Cut the neck of a 1.5-2 liter plastic bottle to the shoulders. Prepare a solution: 1 part cement, 3 parts sand, add water until it reaches the consistency of “cottage cheese in a pack.” Fill the bottle to the top and let it harden. Then cut and remove the plastic - the mushroom stem is ready.
Make a hat using a metal or plastic bowl of the required size: grease the inner surface with sunflower oil or grease, put the solution there to the very top and let it harden a little. When the solution can be cut with a knife, make a hole in the middle 6-7 cm deep. The diameter should be slightly larger than the diameter of the top of the leg. Again, wait for the concrete to harden further, then carefully turn over and remove from the mold. Grind off the edge of the cap with a knife.
 DIY garden sculptures made of cement.
Decorate the hat: make a hole in it, roll a worm from the solution and stick it halfway there. After complete drying, coat the figure with primer and paint. Be sure to wear gloves before starting work.
Galina Ara makes cement jewelry smaller than 150 cm in size without a frame or fittings. A piece of a soft monolith, from which a figure is then cut, can be made using a metal sheet: roll it into a pipe of the required diameter and tie it with a rope. Then fill with the solution and leave to dry.
The disadvantage of this method is that it will not be possible to make figures with protruding parts, with outstretched arms, etc.

More complex country figures require reinforcing elements. A forum member did this cat this way. At first they blinded everything except the head. Then, while pouring cement into the mold, I stuck two reinforcements of the required height and made a frame for the head and ears from thin wire. When the solution (up to the lower jaw) had hardened well, I placed the pipe again, but on a frame made of boards at neck level. I cut out a bottom with a hole for the neck from plywood and filled it with mortar. I cut out the head without removing the wooden support. After 2-3 hours, I removed the frame and coated the border with the solution.
What else can be done for cement: lesson in Arinka’s class
Bird drinker “Autumn leaf”
Take a large burdock or rhubarb leaf. Lay cellophane on the table, make a slide of wet sand, and form a mound in the middle to give the sheet depth. Cover the slide with cellophane. Place the leaf with the veins facing up and straighten it.

Mix non-liquid concrete: 3 parts sand, 1 part cement, water. Place the cement on a sheet: the thickness of the cement mortar in the middle should be 2 cm, reduce to 1 cm towards the edges. Then insert a plastic tube with a diameter of 10 cm and a height of 10-15 cm. Coat it with the solution at the joint, fill the pipe cavity with concrete. Cover with cellophane, leaving gaps for ventilation, and leave the product to dry.
Do not turn over the concrete sheet earlier than after two days!
After the concrete has dried, remove the sheet. If it comes off with difficulty, lightly moisten it with water. The leaf can be painted twice with yacht varnish with the addition of gold, red and orange colors. The result is a high-class garden sculpture!

Garbage bin
Arinka made a trapezoid from old scraps. The size is larger than the diameter of the container, which is inserted into the middle of the mold. Then I nailed a wooden base to the sides of the mold. I covered the walls, the bottom of the mold and the bucket with plastic wrap and secured it with tape. Reinforced with fine mesh. The cement mortar was poured into the mold, making the bottom of the urn (thickness 8-10 cm). Then she inserted a bucket in cellophane into the mold, placed burdock leaves against the walls and gradually poured in the solution, holding the leaves so they didn’t slide off and leveling the bucket in the center.

The urn was covered with cellophane for 5-6 days. After drying, I turned it over, unscrewed the screws in the bottom, and took apart the walls. The leaves were washed off with a stream of water. The top of the urn and sharp edges were sanded with a disc. I painted the urn. The product can be decorated with seashells. Flowerpots, etc. are made using the same principle.

More ideas
Frau made original decorative stones and figurines from the remains of cement left over from paving the paths at the dacha: they put them in piles and two days later they cut out the outlines with a knife. I reinforced only thin crafts with wire and metal mesh.

You can increase the plasticity of the solution using PVA, and reduce moisture permeability with “liquid” nails.
To decorate the area, Olika made beautiful swans using an overturned basin, wire and wet strips of an old duvet cover. I sculpted it, then poured it with water and wrapped it in polyethylene so that the cement would set. A day later, I unwound the film and spread another layer, this time without fabric. I did the neck gradually, over five days. The figurine was painted with oil paint in two layers. The pebbles in the “lake” are crushed stone sprinkled with spray paint.

Nyura5 suggests making a frog for a dry swamp from cement and bricks with crushed stone. Make a model of the figure from any plasticine, and then sculpt a sculpture from it.

Turtles and ladybugs are easy-to-make options and can be made from an old soccer ball cut in half. Simply place polyethylene on the bottom and pour in the solution. The figures can be decorated with fragments of multi-colored tiles.

Waldschnepfer fantasizes about Easter Island statues at his dacha. The heads can be made empty: plant some plants there, forming a kind of hair.

Large statues for decorating a dacha will require a significant investment of time. You can use a thick log or bucket as a base for them. Wrap the base with wire mesh. The nose, lips, eyebrows and other small parts can be made from polystyrene foam, attaching them to the structure with reinforcing mesh, and filling the cracks with polyurethane foam. Coat the frame with cement, dry and paint. The garden keeper is ready!
Based on materials from participants of the forum "House and Dacha"
Quite often, even with a successful arrangement of plants in the garden, there remains a feeling of understatement and a general impression of incompleteness. Garden sculptures can help with this problem; placing them well on the site can achieve a great effect.
A little history
Man has been decorating the local area with sculptures for more than a millennium. But if in the past this was done mainly for practical reasons, for example, protection from evil spirits, now aesthetic considerations have come to the fore.
In Russia, the tradition of installing sculptures in gardens and parks owes its origin to Peter I. Then the works of Italian masters were installed in the Summer Garden. The novelty appealed to the taste of the broad masses, and the nobles gladly followed the example of Peter I.

Of course, those sculptures bore little resemblance to DIY garden crafts made from cement. Mainly images of Greek deities and statues of various emperors were used.
About the classification of sculptures
In general, all sculptures used to decorate gardens and parks can be divided into 4 types:
- classical type - most often these are images of deities, emperors, famous people, etc. The main materials are bronze and marble. Such sculptures look great in large areas, decorating, for example, the entrance to a luxurious mansion;

- art sculpture - this category includes everything incomprehensible that attracts the eye, and in some cases causes bewilderment. Such sculptures can be made from literally any material. In addition to the usual stone, concrete, metal, even hardened polyurethane foam, etc. can be used;

Note!
Such decorations look somewhat provocative and require special attention when placing them in the garden.
There is a considerable risk that the author's intention will remain unclear.
- sculptural additions;
- small plastic – it is representatives of this group that can most often be found in garden design. Wood, plastic and cement concrete mixture are most often used as the main working materials. Although, instead of making it yourself, it is quite possible to purchase a small beautiful one, their price is not so high.
Features of decorating a garden with sculptures
In this case, it is necessary to take into account not only the general design style, but also the nuances of the location of ready-made figures on the site. For example, a majestic human-sized sculpture will look ridiculous against the backdrop of a small, modest house.
The following garden design styles can be distinguished:
- formal style - suitable only for large plots, used when decorating the area around large mansions, etc. In this case, marble and bronze figures would be appropriate; they will look solemn, and an expensive appearance will only enhance this feeling;
- design in the English style - in this case, the goal is to bring the environment as close as possible to nature. It is allowed to use small homemade figurines, for example, garden gnomes;

- rock garden (design in Japanese style) – boulders would be useful here; natural stones may not be at hand. Below we consider the option of creating a boulder from a cement concrete mixture with your own hands;
- rustic style - DIY garden crafts made from cement would be appropriate here.
Several original ideas
Of course, not every sculptor can make a human-sized sculpture, especially from marble or cast from bronze. Moreover, this task is beyond the capabilities of an ordinary person. But you can show just a little imagination and independently make whatever your heart desires from an ordinary cement concrete mixture.
Using a minimal set of tools you can make the following garden decorations:
- boulders, outwardly they will not differ from natural stones, will have fairly high strength and low weight;

- bright, colorful stone flowers;
- unique ;
- bird drinkers in the form of, for example, a tree leaf;
- just decorative garden figurines made of cement with your own hands– these can be both images of animals and fairy-tale creatures.
It makes sense to consider several “recipes” for making such jewelry.
Homemade boulder for a Japanese rock garden
To make a hollow boulder, in addition to the cement concrete mortar itself, you will also need a plaster mesh - a frame will be formed from it.
The work is performed in the following sequence:
- First, a frame is formed from lightweight material. Anything that is lightweight will do (cuts of polyurethane foam, crumpled paper or plastic bags);

- the core is wrapped with plaster mesh;

- after this, the solution is applied to the frame with a small spatula;

Note!
To maximize the resemblance to natural stone, the surface of the mortar does not need to be leveled.
- after that, all that remains is to cover the finished product with cellophane and wait until it dries. If you dry a boulder in the open air, it is likely to crack.

In a similar way, you can make a perfectly round ball; such DIY cement figures for the garden, painted in bright colors, will enliven even the most dull environment.
In this case, the role of formwork will be played by an ordinary children's ball. A small hole is made in its wall and cement mortar is poured inside through it. After a couple of days, the “skin” can be removed, and the cement ball can be primed and painted in a bright color.
Drinker in the form of a leaf
To make an original drinking bowl, you will need an ordinary large leaf of burdock or any other, a little sand, a piece of polyethylene, cement concrete mortar and a piece of pipe with a diameter of about 10-15 cm. The main highlight is that all the veins from the burdock leaf will be imprinted on the surface of the cement mortar.
Instructions for making the figurine look like this:
- polyethylene is spread on a flat surface;
- a small sandy mound forms on it;
Note!
In order for the sand to keep its shape well, it can be moistened.
- another piece of cellophane is laid on top of the sand, stretched and fixed with stones in the corners;
- a sheet is spread and smoothed over it;

Note!
There will most likely be several small holes on the sheet.
To prevent the solution from leaking through them, you can simply lay small pieces of sheet on top of them;
- the sheet is coated with the solution;
- in the central part, a pipe is placed on a layer of cement concrete and filled with mortar.

After this, all that remains is to wait for the mixture to dry. The remains of the sheet are removed, the concrete is primed and painted, you can age its surface when painting, this will only enhance the aesthetic effect.

Homemade sculptures
If free time allows, you can make more complex garden sculptures with your own hands from cement.
In general terms the same approach is used:
- It is not advisable to make massive parts of the sculpture solid. So the weight of the figure will be too large and the cement concrete will take too long to dry. It is best to use old containers for the frame;
- for elongated elements, the frame can be made of reinforcing bars or wire.
For those who want to diversify the appearance of the garden, we can recommend a flowerbed-lake, on which medium-sized swan figures will be located. The swans themselves will be made of cement concrete mixture.

The work is performed in the following order:
- the body frame is an inverted old basin, and for the neck you will have to weave a wire frame;
- the frame is coated with a layer of cement concrete mixture, the head is formed;
- The necessary texture of the surface will be given by small pebbles pressed into cement concrete and painting.
Flowerbed in the shape of a hand
A mini-flower bed (or flower stand) can be made using an ordinary medical glove. To do this, just fill it with the solution and wait for the mixture to harden. Then you just need to remove a thin layer of rubber and the original stone hand is ready for use.

These are not all do-it-yourself garden sculptures made of cement; in this matter, the only limit is your imagination. With minimal effort and time, you can make cute boletus mushrooms or bright fly agaric mushrooms; they will look great in the depths of the garden.
Another option for simple figurines is stone flowers (from hemispheres), ladybugs and other creatures that do not require attention to detail.

In conclusion
Decorating gardens with sculptures is only gaining popularity. This is a great way to diversify the look of your favorite area that has become boring over many years. It is also important that most of the sculptures can be made independently, that is, the financial costs of their production are minimal.
The video in this article shows cute examples of figurines for garden decoration.

Crafts can be made from almost any gift of nature, even from thistle and burdock. Today we will tell you about such unusual crafts. First, let's get acquainted with these plants, and then make some interesting crafts from them. They can’t all be weeds; let them serve us as material for crafts.
Thistle and burdock - also called burdock - belong to the Asteraceae family. These are biennial herbs, some of their species are honey-bearing, so they are very popular. So not all weeds are unnecessary - some are even very useful. Thistle blooms with lush inflorescences. The stem and thin carved leaves are covered with sharp long needles, and therefore it is better to use gloves and scissors when collecting thistles. Thistle inflorescences are an original material for making hats and even heads for figurines.
You can collect thistle inflorescences all summer, then you will have inflorescences of different shapes and sizes in stock, and this gives you much more opportunities for work. 
Burdock inflorescences have small hook-like scales, and therefore also require caution when collecting. They can be used for hats and other parts. For better storage of thistle and burdock inflorescences, it is advisable to treat them with glue. 
Cheerful musician
The musician's head is a thistle, his body is an acorn, his feet are a guitar, his feet are a stand, and his legs are twigs. You can attach them to each other using glue. And attach the legs and arms to the acorn after making small holes in it along the diameter of the branches. 
A dog made of burdock and a man made of thistle and acorn
The body and head of the dog are made from burdock. The ears are made of scales, the legs are made of bush twigs. The owner of the dog is made from thistle and. The figurine's feet and stand are made of bark. We will attach the parts of the dog and the man in the same way using glue and holes. 